Speaking of Bitters…

Let’s all shed a tear for the end of The Minimalist column in The New York Times. Mark Bittman has given us years of simpler but not simplistic recipes – particularly the famous no-knead bread (original here, quicker version here) that really jump-started the homemade bread craze in New York City.

Well. At least there are archives of the nearly 700 columns to turn to in moments of need. And as a farewell, he combined my two current cocktail obsessions: bitters and champagne!

Tony Cenicola/The New York Times

Tony Cenicola/The New York Times

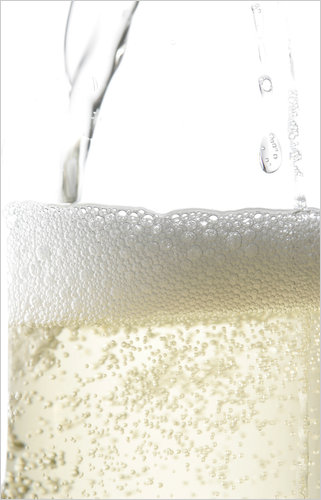
bittersweet champagne cocktail:

  • 3/4 teaspoon bitters
  • 1/2 ounce lemon juice
  • 1/4 ounce maple syrup
  • 6 ounces Champagne
  • Twist of lemon.

Stir the bitters, juice and syrup in a flute. When combined, add the Champagne. Squeeze the lemon twist over the top, wipe the rim with it and discard.

Yield: 1 drink.

I must try! Bitters and champagne in one drink, what are the chances?

Email or Share This Post

Bitters

Just what the hell are bitters?

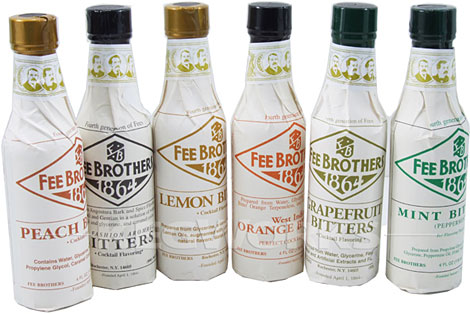
Fee Brothers Old Fashioned Bitters, in many flavors

Fee Brothers Old Fashioned Bitters, in original or flavored

A friend sent me a Wall Street Journal article on recreating an 1896 dinner that included a drink recipe with bitters in it.

But [Mr. Kimball] also discovered perfection in a 19th-century punch (4 tablespoons sugar, 8 tablespoons lime juice, 1 cup rum, 1 cup water, pinch of nutmeg, 5 drops bitters—combine, then pour over ice). “It was so good,” he says, “that we have been drinking it ever since.”

If they had bitters in 1896, they must be somewhat organic, right? (As opposed to some sort of newfangled chemical process, which is how I had always imagined them.)

86378341348714733

It turns out they are literally just bitter herbs marinated in high proof alcohol, such as vodka, for several months. Jamie Boudreau has written quite the definitive explanation of bitters on his blog, and included homemade recipes as well as details of the classic flavor combinations to make bitters.

THE BITTERING AGENT
This will be the ingredient that will make your bitters, well, bitter. Common ingredients are gentian, quassia or even wormwood (famous as an ingredient in absinthe). These flora are usually extremely bitter, and a little will go a long way.

THE FLAVOR
This is where you have your chance to show off your creativity. Simple bitters will have one flavor, such as orange or peach or grapefruit. But the sky is the limit when it comes to bitters. Want to add vanilla-cardamom? Go for it! Lemongrass and ginger? Why not? Xocolatl Mole? Been done!

Obviously more ingredients will add more complexity to your bitters, just make sure that they play together and remember, sometimes simple one and two flavor bitters are better.

THE SOLUTION
Most bitters are kept in alcohol, but you can make non-alcoholic bitters if you really wanted (they will have a very short shelf life). I usually try to find the highest proof alcohol I can get my hands on, as this seems to extract more flavor from my herbs and spices as well as give the final product an indefinite shelf life (alcohol is a preservative after all). For lighter bitters I may use a high-proof vodka or gin as my solution, while rum, whiskey and brandy are the spirits that I look to when creating heavier, darker bitters.

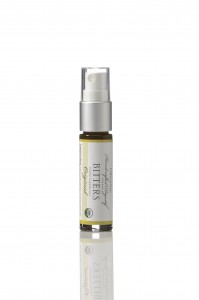
orig_spray-0958_

Here’s another recipe and explanation from the creator of Urban Moonshine, which makes a – for real – a purse-sized spray of bitters in three flavors. I guess some people just can’t let anything get between them and their bitters.

Winter White and Lace

I’m still loving the white table for winter…{here, and here}

marthastewart.com

marthastewart.com

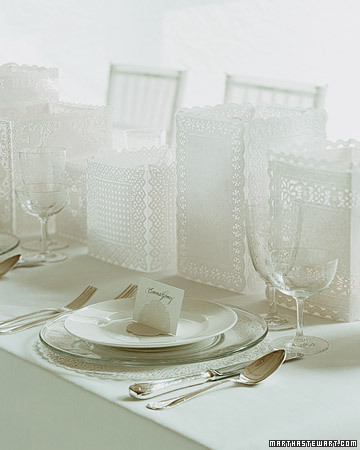
Martha makes these gorgeously simple lace-covered candle holders, which would look so pretty with baby’s breath bouquets. She says to use rectangular doilies. Where does one find such a thing, I wonder? At a craft store, probably. Or definitely online. A little double-stick tape, and you’re all set with a table that has texture and depth, for not much money. Love it!

Champagne Tasting Party Report

vcp

It was a fabulous New Year’s Eve. We kicked back with a select number of cool friends around (not too many, not too few), it was raucous at times, chill at times, and so fun we almost forgot to count down to midnight. I think a few people were actually a little annoyed that we interrupted the dance party for such a mundane event.

So yeah. Awesome.

AND I continued my streak of totally forgetting to take photographs of things, and while there were lots of people taking photos, none of them has volunteered any of them to go on the internet, which should also confirm that yes, it was a good party.

I’ve decided I need to designate an official photographer (who is not me) at any events I want to go on BB&B, because I’m clearly just never going to do it on my own. Too much rushing around, answering doors, making sure food is properly finished and presented, refilling drinks, changing playlists, introducing people – you know the drill of throwing a party. Maybe one day I’ll remember to take photos…

So what won the champagne tasting? It’s so predictable that’s shocking.

champs

The widow herself: Veuve Clicquot.

The Veuve and Perrier-Jouet were probably the most expensive champagnes there – no one was going to go nuts on a really nice bottle on a night when our taste buds probably weren’t in top form – and the Veuve won hands-down. The Perrier-Jouet actually was almost in last place. To test the results, I opened a bottle the other night and um, YUM, it’s tasty. My theory is that because it’s a drier champagne, all the sweet ones we tried blew out the subtler flavors of the Perrier, making it taste kind of not so nice compared to all the others.

So eh, it’s not an exact science. But it’s a fun one.

Craft’s Roast Chicken

Craft is my favorite restaurant in New York. It has simple, mouthwatering food and fantastic service – and best of all, no gimmicks or faux coolness. It’s just good. And it was five blocks from my apartment.

Anyway, this is not meant to be an advertisement for Craft. Tasting Table is doing a sous chef series and their first recipe is from Craft sous chef James Tracey, for Roast Chicken. I’m going to have to try this.

See the instructional video HERE
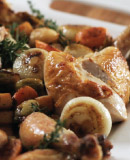
roast-chicken-with-seasonal-vegetables

ROAST CHICKEN WITH SEASONAL VEGETABLES

JAMES TRACEY, CRAFT, NYC

Yield: 4 Servings

INGREDIENTS

For the Chicken
  • 1 whole chicken (about 4 pounds)
  • 1 sprig rosemary
  • 6 sprigs thyme
  • 1 sprig sage
  • 8 medium garlic cloves
  • 2 tablespoons extra-virgin olive oil
  • ½ pound carrots, cut into ¾-inch pieces (about 2 large carrots)
  • ½ pound turnips, cut into ¾-inch pieces (about 2 medium turnips)
  • ½ pound rutabaga, cut into ¾-inch cubes (about 1 medium rutabaga)
  • ½ pound of cippolini onions, peeled (about 8 to 10 onions)
  • ½ pound of brussels sprouts, halved (about 10 brussels sprouts)
  • 4 tablespoons (½ stick) unsalted butter
  • Salt and freshly ground pepper

DIRECTIONS

1. Preheat the oven to 350°. Stuff the chicken cavity with the rosemary, thyme, sage and garlic and season it liberally inside and out with salt and pepper. Using butcher’s twine, truss the chicken.

2. Place a medium roasting pan on the stovetop over medium-high heat and add the oil. Using tongs to move the chicken, cook the legs and thighs on both sides until the skin is golden brown, about 3 to 4 minutes per side. Remove the chicken from the pan and set aside.

3. Add the carrots, turnips, rutabaga, cippollini onions and brussels sprouts to the pan and cook, stirring occasionally, until the vegetables begin to brown at the edges, about 5 to 8 minutes. Return the chicken to the pan, add the butter and transfer to the oven. Roast the chicken, basting every 15 minutes, until the juices run clear when the thigh is pierced with a knife, about 60 minutes. Transfer the chicken to a large cutting board and let it rest for 10 minutes before carving. Remove two garlic cloves from the chicken and reserve.

4. Place the roasting pan over high heat and add the reserved garlic. Bring the mixture to a simmer, stirring frequently, and cook until the vegetables are glazed and the liquid has reduced by about one-third, about 2 to 3 minutes.

5. Transfer the carved chicken to a serving platter, spoon the glazed vegetables around it and serve immediately.

Pappardelle and Scallops

scallops

fishex.com

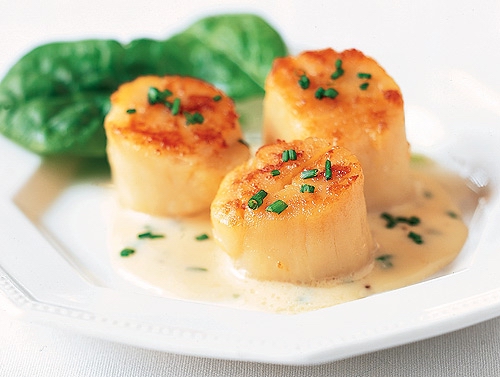
Guy Fieri made this dish – pappardelle pasta with scallops, lightly wilted argula, mushrooms, and a light drizzle of truffle oil – on his show recently and the way he made it just looked so yummy and easy. Perfect for a one-dish dinner party. Just make it, serve it, and voila, you’re done! Maybe buy a tub of ice cream for dessert if you’re really ambitious :)

Scallops are an ingredient I’m kind of terrified of. They seem so easy to over- or under-cook. Luckily, I found Tasty Kitchen’s extremely detailed tips on how to properly cook this intimidating ingredient:

1. Cook your pasta in salted water: Bring a big pot of water to boil and add enough salt so it’s slightly salty. This gives your pasta flavor and you’ll end up using less salt or sauce in your dish.

2. Everything ready to go: This dish cooks up so quickly that you really need to have all your ingredients prepped and close by. You don’t want the seafood to get cold while you’re furiously chopping tomatoes.

3. Dry seafood: Before you begin cooking, you really want to pat your seafood very very dry. And I don’t mean a sloppy dry. Use a couple of pieces of paper towel and really make sure that you blot all the moisture away. The reason this is so important is because seafood cooks really quickly. Any moisture on the seafood will end up steaming the seafood instead of pan-frying it.

4. High heat or low heat—no middle heat: Here’s my rule for cooking small pieces of seafood, like scallops, shrimp, or chunks of fish. Either go high heat or low heat, but not in the middle. The high heat will give you a wonderful sear, that charred crust that I will give up my Gucci purse for. A low, slow heat will gently cook the seafood so that it has a silky texture, but that’s for another lesson.

5. Don’t overcook your seafood: I know it’s obvious, but I do have to say it. For scallops and shrimp, they really only need a couple of minutes on each side. If you’re using small bay shrimp (about the size of a small marshmallow) – 1 1/2 minutes on each side or less.

I have to screw up my courage and just cook scallops eventually, because a) I love them generally, and now b) I really want to make Guy Fieri’s pasta dish.

Vintage Car Inspiration

I loooooove this post on vintage cars that inspire wedding themes. The main thing they talk about are table design, actually, so it’s really worth a read for those of you love tablescape ideas as much as I do.

http://www.snippetandink.com/guest-blogger-ruby-press.html

http://www.flickr.com/photos/persnicketydame/3599726870/in/faves-32693985@N06/

It’s a guest post on Snippet & Ink, by Ruby Press. Check them out, its a great website filled with quirky finds that are hard to find.

Related Posts with Thumbnails